A lil' history ...
 As if we haven't seen enough Aiptek R/C switches, here is yet another,
this time designed around a PIC microcontroller.
Since the design is based upon a Flash PIC (PIC12F683), you can
continually download new code, allowing for experimentation and
prototyping.
As if we haven't seen enough Aiptek R/C switches, here is yet another,
this time designed around a PIC microcontroller.
Since the design is based upon a Flash PIC (PIC12F683), you can
continually download new code, allowing for experimentation and
prototyping.
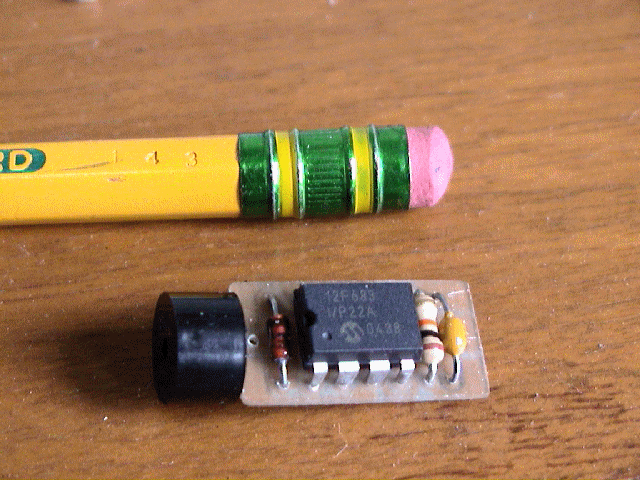
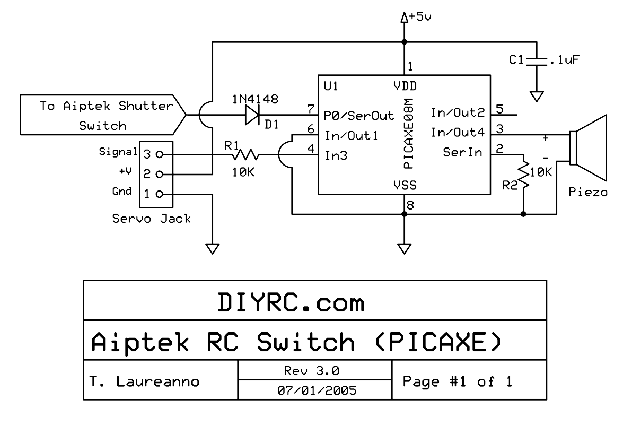
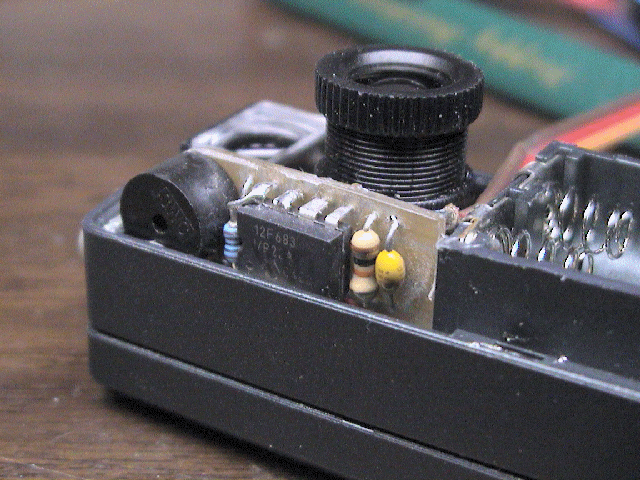
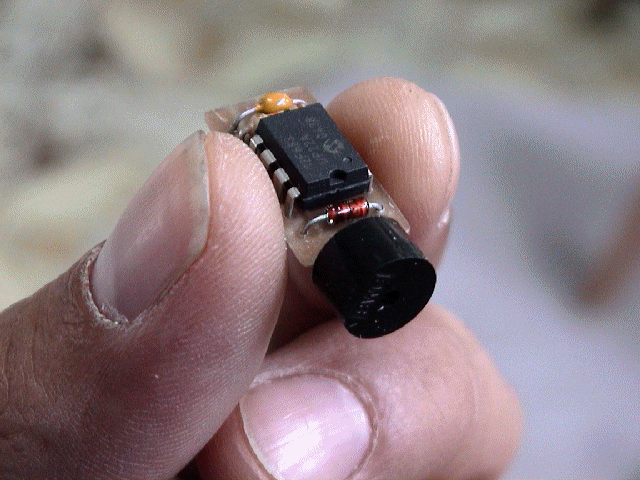
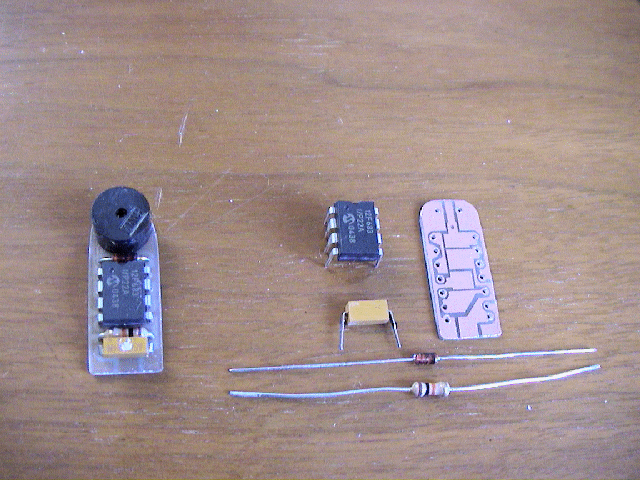
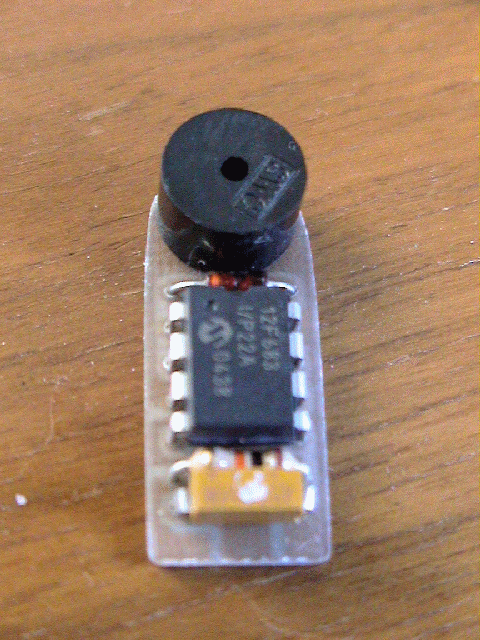
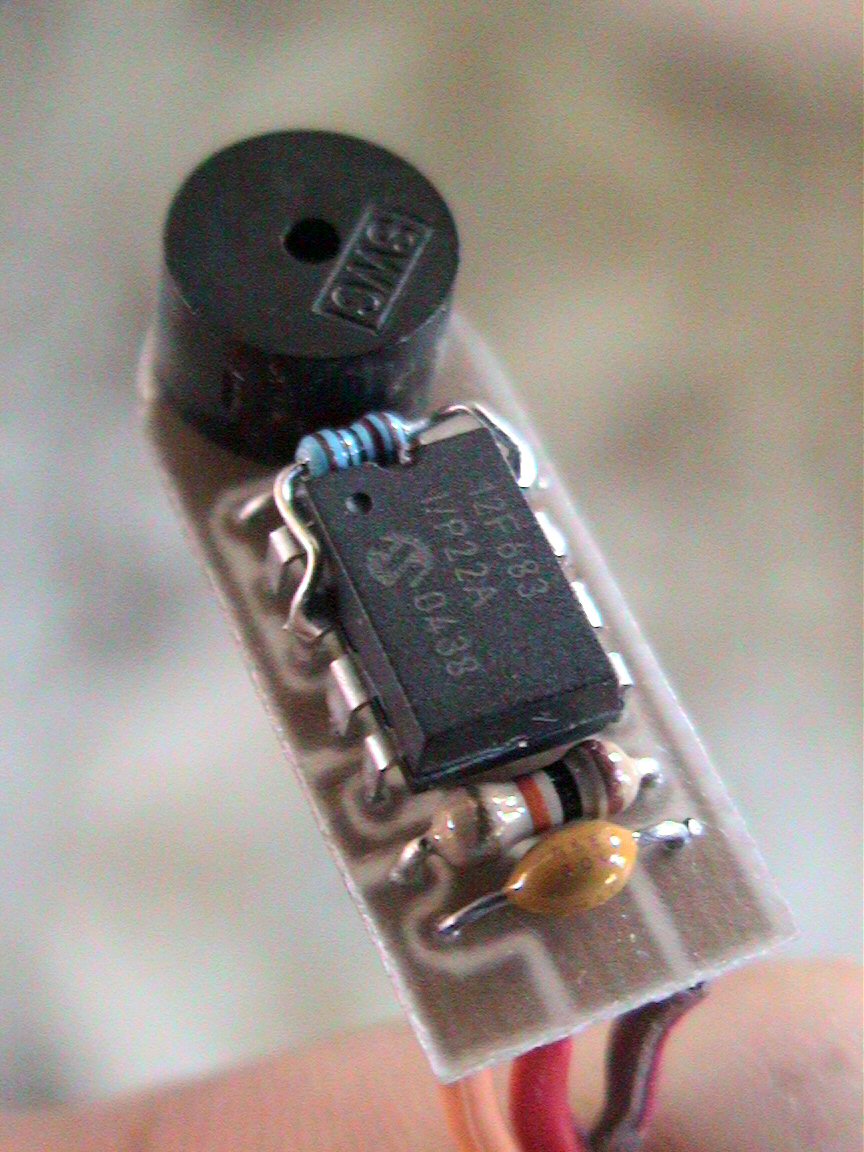
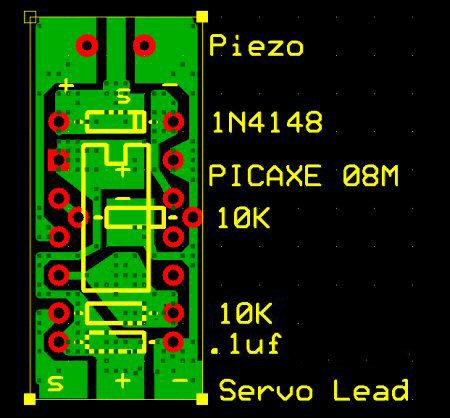
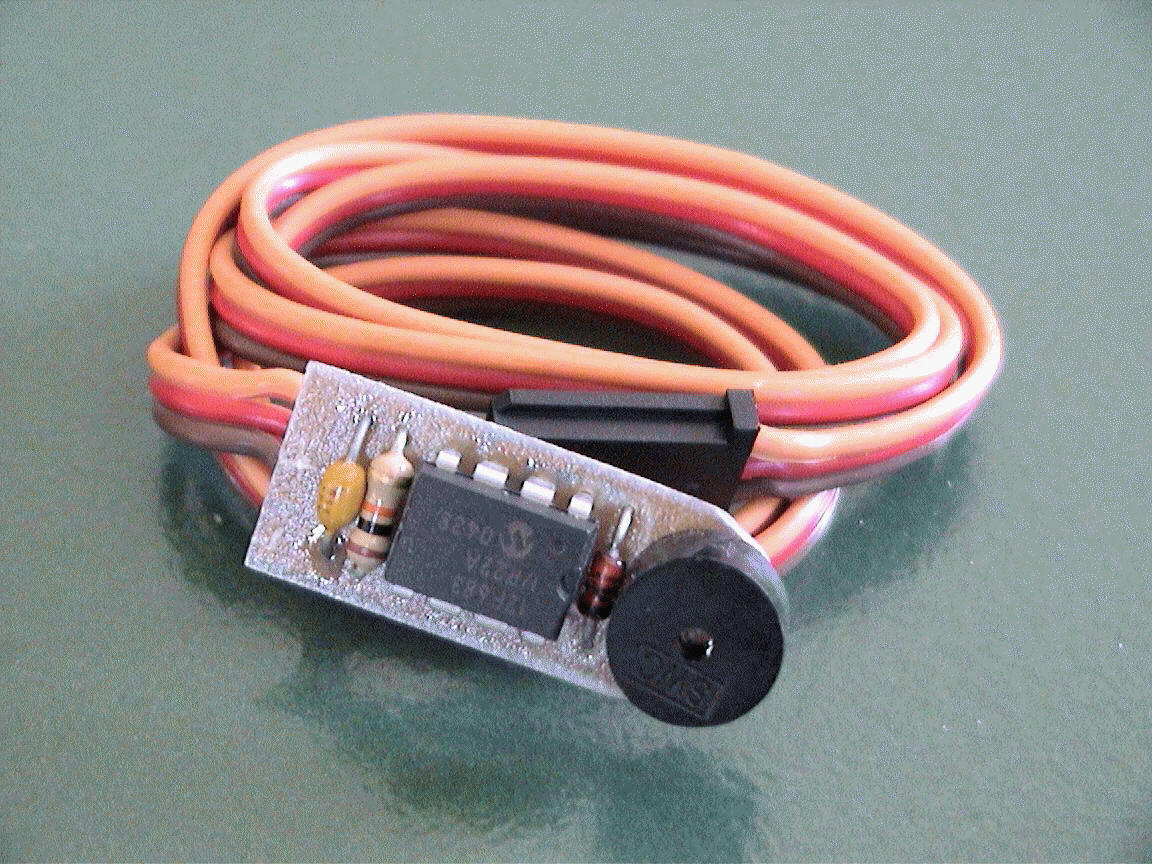
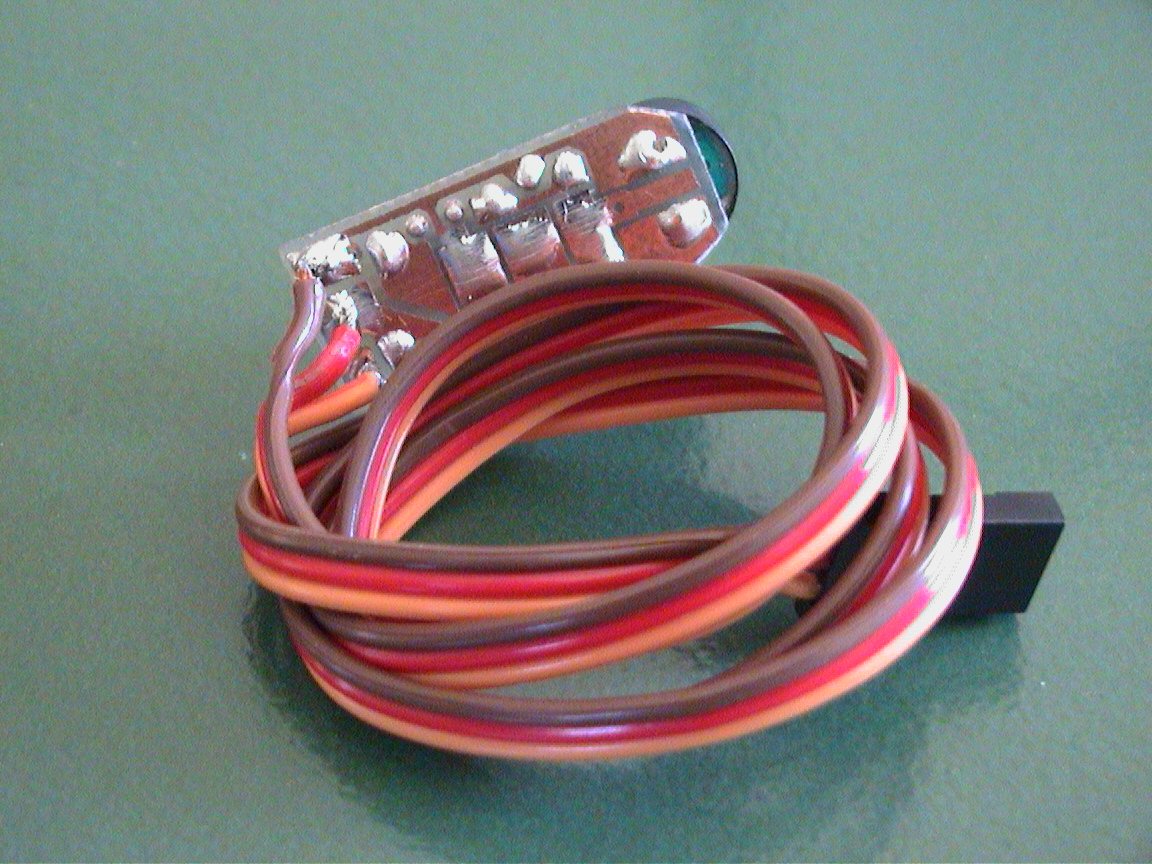
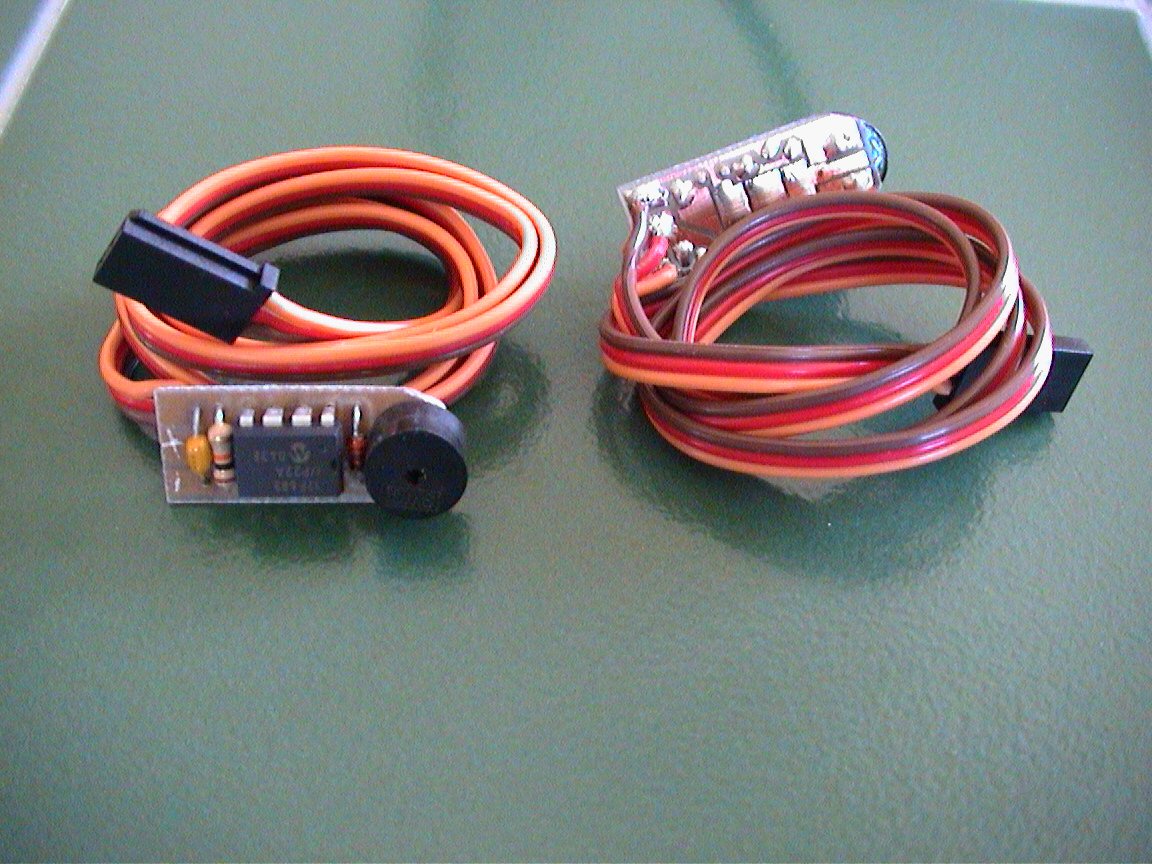
I designed this nifty circuit using a preprogrammed PIC
microcontroller, a piezo element, two 10K ohm resistors, a .1uF
capacitor and a 1N4148 signal diode. This neat device allows you
to program switch-on points and switch/stick direction. The unit
even stores the settings in internal memory. If the circuit
senses that there exists no servo signal, a piezo beeper is sounded.
This can be used as a model-finder. Next time your plane gets
lost in the high grass, you can simply turn off your transmitter and a
second later, the beeper continually emits beeps, allowing you to
locate the downed plane. The circuit also has a built in trigger
delay that does not allow the Aiptek camera to attempt to take
pictures faster than it can store them to memory. These
user-programmable functions are very easy to use.
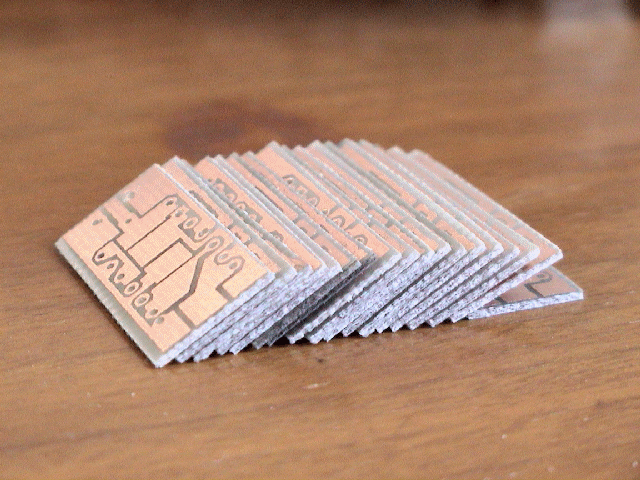
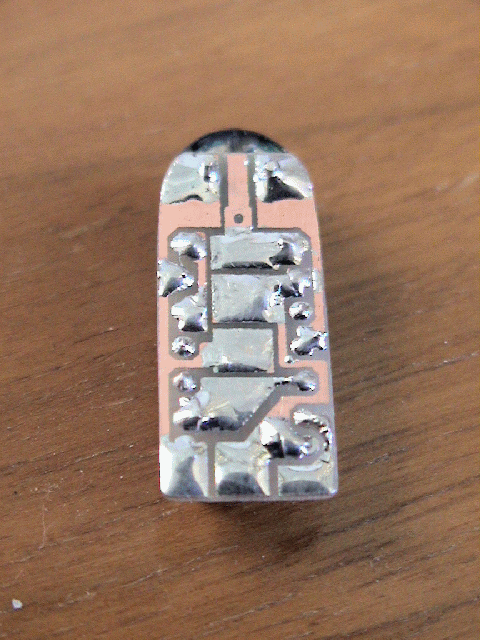
Newer pictures !! (new circuit/PCB
design as shown below)
..more coming soon


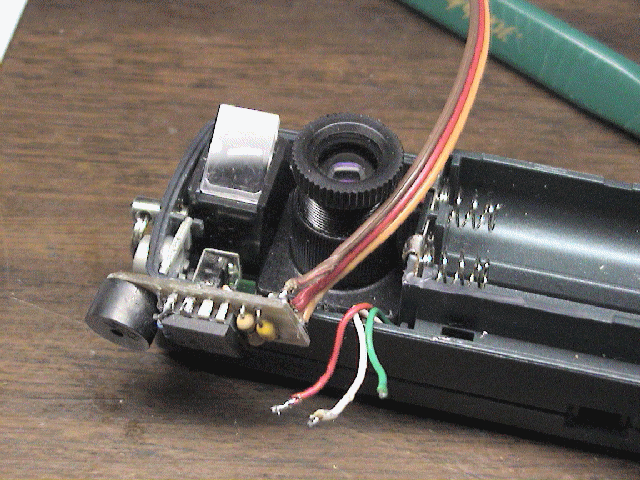
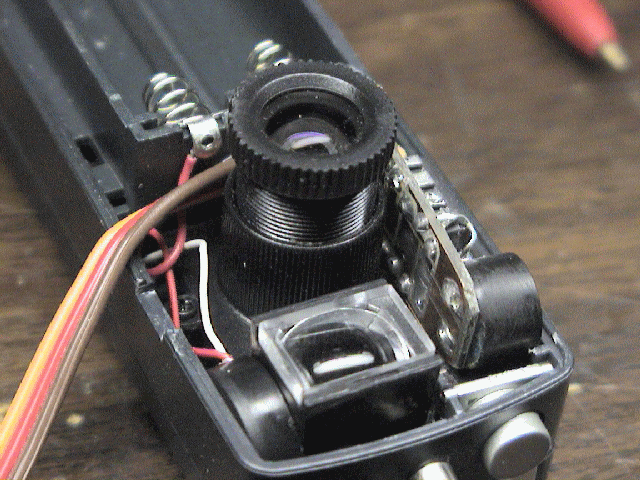
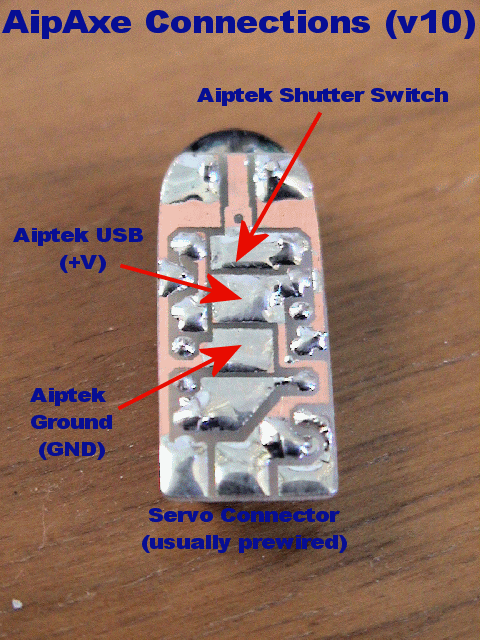
Below are a few pictures that show you how this
AipAxe switch installs in an Aiptek 1.3M digital camera...
 Older
pictures are shown below (Version 1):
Older
pictures are shown below (Version 1):
 See
how to install this in an Aiptek 1.3 SD Camera !
See
how to install this in an Aiptek 1.3 SD Camera !
Design Criteria Summary:
1) ...more coming soon
Parts & Tools List
...
1)
...more coming soon
Building Instructions...
...more coming soon
Firmware/Code...
Click
here to View Code (Sorry, firmware is no longer freeware)
Click
here to Download Code (Sorry, firmware is no longer freeware)
CHECK
BACK LATER.... I WILL BE ADDING FREE CODE "SNIPPETS" !!
Testing and Operation Instructions...
DOWNLOAD
THE USER'S MANUAL (MS WORD)
DOWNLOAD
THE USER'S MANUAL (PDF)
OPERATING INSTRUCTIONS
1. With both the transmitter
and receiver powered off, plug the camera's servo plug into the receiver channel
# to which you want to use as your shutter control. This can either be a
switch or joystick.
2. Power up the transmitter
first and position the switch or stick (corresponding to channel on receiver
which switch is connected) in the direction to which you would want to be the
OFF position (the position where no picture is taken).
3. Now power up the receiver
and you will hear the switch and Aiptek camera eventually power up (beeps).
About a second or two after that (as the circuit analyzes the receiver servo
signal), you will hear a "Ready" beep (2 low beeps then a longer high beep)
indicating that the circuit is ready for operation (no others beeps should be
heard until you take a picture).
IS THAT SIMPLE ?
4. To take a picture, move
the joystick/switch to the On position and then return it to the opposite (OFF)
position. You should hear the switch circuit output a low to high chirp,
and then quickly hear the Aiptek camera take a picture (also visible on the
Aiptek display). If the transmitter's switch/joystick if left in the ON
position, the switch circuit will make the Aiptek camera take a picture
approximately every 7 seconds, until the switch/joystick is returned to the OFF
position.
5. If you were to turn
off the transmitter while the receiver and camera are powered up, the switch
circuit will eventually continually beep, indicating that there exists no servo
signal. This is the built-in "Model-Finder" alarm that will hopefully help
you locate a downed aircraft. Just power off the transmitter and the
circuit will begin to beep.
6. Upon powering up the
transmitter, you will eventually hear a "Ready" beep (2 low beeps then a longer
high beep) indicating that the circuit is ready for operation once again.